Sunday, 29 March 2009

How to contour your face

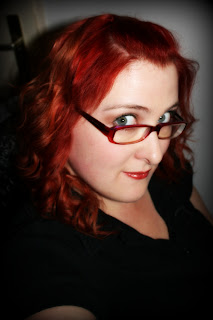
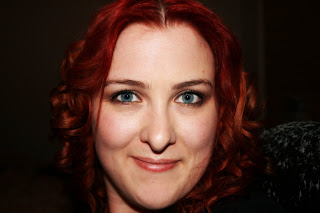
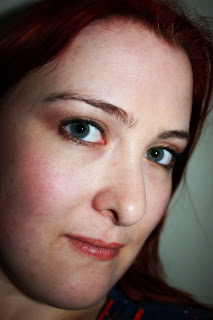
This is maybe not the best photo to use for this purpose, but you will at least get the idea:


1. Suck in your cheeks to locate your cheek bones. Brush a small amount of contour powder under your cheek bones. Also add some to the bridge of your nose, your hairline and at your temples. Blend all areas well.

2. Use a lighter shade of powder to highlight your face. Brush highlighting powder on your cheeks, the bridge of your nose, your chin and on your forehead.

3. Blend all well so there are no harsh lines. Use a clean brush for the best blending results.


Some tips for your face shape:

Oval Face
An oval-shaped face is usually broader at the cheeks, tapering in slightly at both the forehead and the chin. Because of its symmetry, you do not need to contour and highlight your face. An oval face can support most makeup trends-so have fun!

Round Face
A round-shaped face is fuller, shorter, fairly wide, with full cheeks and a rounded chin. If you have a round-shaped face:
- Highlight your forehead, underneath the eyes on top of the cheekbones, and the center of your chin to draw attention to the center of your face.
- Contour your temples, cheeks, and jawline to create the illusion of an oval.

Square Face
A square-shaped face is the same width at the forehead, the cheeks and the jaw. If you have a square-shaped face:
- Highligh down the center of your forehead, underneath the eyes on top of the cheekbones, and the tip of your chin to draw attention to the middle of your face.
- Contour your hairline at the two corners by your temples and the jaw at the two corners.
- Apply blush on the apples of your cheeks to help draw attention away from the corners of the square and help widen the area and make it appear more oval.

Heart-shaped Face
The heart-shaped face is wide at the forehead and curves down to a pointed or narrow chin, like an inverted triangle. If you have a heart-shaped face:
- Highlight the chin to help broaden it. Highlight the forehead and underneath the eyes on top of the cheekbones to draw attention to the center of your face.
- Contour the temples and cheeks to diminish the width of this portion of your face.

Pear-shaped Face
The pear-shaped face is narrow at the temples and forehead and wider at the cheeks and jawline. If you have a pear-shaped face:
- Highlight your forehead to create the illusion of width, and highlight underneath the eyes on top of the cheekbones and the tip of your chin.
- Contour the jawline and the cheeks to minimize their width.

Long Face
The long-shaped face has high cheekbones, a high, deep forehead and a strong, sharp, chiseled jawline. If you have a long face:
- Never highlight or contour your face. This will only make your face appear even longer.
- Brush a bit of bronzer across your chin to help shorten its length.
- Be generous with your blush and place a lot of color on the apples of your cheeks. This will help widen and shorten your face.
- Bangs can help shorten the length of your face as well.

A hot pink and black look


It's been a while since I last did a 120 pro palette look, so I thought it was about time to pick up where I left off and do another look:

Without Flash


With flash


Thursday, 26 March 2009

How I clean my brushes


Now we made our own brush cleaner, it's time to start using it! :)

What you need for daily cleaning:
Cup or container
Brush cleanser
Paper towel or something to wipe your brush with
Dirty brushes (and boy do we have plenty of those >.<)

1. Take the cup or container and put a little of your brush cleaner in.
2. Next take a brush and soak it for a few seconds in the brush cleaner.
3. Then wipe your brush on the paper towel, you should see the dirt coming off!
4. Repeat step 1 and 2 till there is no more makeup coming off your brush.
5. Reshape the brush tip and store your brushes to dry. Make sure you always lie them down flat while drying to prevent water going into the handle. If this happens it damages the glue and your brush, and it might break or let loose!

Usually the small brushes dry very quickly, but if you want to make sure your brushes are nice dry and fresh in the morning, clean them before you go to bed and let them dry during the night :).

This method is for your daily use, but I recommend giving your brushes a deep clean every 1 or 2 weeks, depending on how much you use them.


What you need for deep cleaning:

(optional) olive oil and a paper towel
A sponge (or your hand)
Baby shampoo
and of course your brushes

1.This step is optional. Put some olive oil on a paper towel and brush your dirty brushes on it. The oil will help break sown the makeup on your brush. This is really good for lip brushes (waxy lipstick), concealer brushes and it also helps soften your bristles. After this, rinse your brush. Make sure you don't get any water above the metal part!
2. Turn on the water (warm, not hot) and put a little bit of baby shampoo on your sponge. If you don't have a sponge, use your hand. Just put a little bit of shampoo in the palm of your hand and wipe the brush in your palm.
3. Wet your brush and wipe it all over the sponge till you get all of the dirt off.
4. Rinse your brush in the warm water. Again, make sure you only hold the bristles in the water and that the water does not get above the metal part!
5. Repeat step 2,3 and 4 till your brush is clean.
6. Reshape the brush tip and store your brushes to dry. Make sure you always lie them down flat while drying to prevent water going into the handle. If this happens it damages the glue and your brush, and it might break or let loose!

This method takes more time for your brushes to dry so I really recommend doing this in the evening, unless you don't need your brushes during the day.

I hope this will help you to clean your brushes and make sure you can use them for a long long time cause of good maintenance! :)

How to make your own brush cleaner


I was watching the video's of EnKoreMakeup and saw him cleaning his brushes with his home made brush cleaner. Since I still needed to get something good to clean my own brushes with, I decided to make a brush cleaner and show you guys how to do it! :). It cleans, disinfects and conditions your brushes.

What do you need to make your own brush cleaner:
Purified water
Alcohol (i used 70%)
Dish washing soap
Shampoo (I used baby shampoo)
Leave in conditioner (make sure it is liquid)
A Mixing bowl/jar
An empty bottle
and something to stir with.


1. Put 1 cup of water in your bowl.
2. Put 1/4 of a cup of Alcohol in
3. Put 1/2 tablespoon of dish washing soap in
4. Put 1/2 tablespoon of shampoo in
5. Put 1 tablespoon of stay in conditioner in.
6. stir it all, be very gentle! We dont want it to foam.
7. poor it into your empty bottle.

...and voila! You have your own brush cleaner! :)

Sunday, 22 March 2009

A Pink and Brown natural look (inspired by 'Confessions of a Shopaholic')


Saw the movie today and I loved it! After I got home I decided to do a natural look (like Rebecca is kinda wearing throughout the movie) so I hope you guys like it:


Btw, the lens of my camera died on me and is now back to the shop for repairs. This is going to take about 5 to 6 weeks so these pictures are made with the cam on my phone. Needless to say they aren't the best quality but it's better then nothing. I do have a point and shoot coming my way which should be here in a day or 2. When it's here ill try redo this look and take better pics!

Thursday, 19 March 2009

2nd contest entry for Petrilude's makeup contest


I wasnt pleased with my first entry, so I gave it a second shot today. It looks simple but took me about over a hour to get it ready. I think it turned out better then I thought it would, I hope you like this:

I only used my 120 pro palette since thats about all the eyeshadow I own atm.


Wednesday, 18 March 2009

Contest entry for Petrilude's makeup contest


This is my (first) entry for Petrilude's makeup contest. Loved the picture he has for inspiration, so this is my go at a look inspired by it.


I kinda dont like how the false lashes screwed up the look. I figured they might look cool but I never tried them before...big mistake! Sigh..o well...guess ill have to get some more inspiration and do another look...

For those of you interested...these are the colors I used:

Tuesday, 17 March 2009

a Spiderman Inspired look


As mentioned in the video, this is not originaly my idea, I just did the look with the 120 pro palette. The original is from xsparkage go check out her video. Here are some photo's of my try at this look:


Saturday, 14 March 2009

How I curl my hair with a straightener


I used the Remington Sleek & Curl straightener and some HotCurl spray (L'Oreal) for making curls with a straightener or curling iron. It took me a bit of time to figure out how to exactly do this, but once you get the hang of the basics, it's just a matter of practice to get it perfect (and im not there yet).

Remington Sleek & Curl:

  • Digital LCD heat control 130ºC - 200ºC
  • Teflon ceramic coated plates for ultra smooth styling
  • Tourmaline ionic conditioning reduces frizz for super sleek and shiny results
  • Professional heat protection
  • Suede box and pouch
  • Exclusive rounded design with ridges
  • 3m cable
  • Sleek & Curl Curl Secrets DVD

Ill try to discribe how to curl your hair with the straightener. I like to put it on really hot, but you have to figure out what works best for your hair:
  1. Section your hair by layers from bottom to top and secure with hair clips.
  2. Take a small section of hair and place the iron towards the root of your hair.
  3. With your other hand you wrap the section of hair once around the iron (or turn the iron once around) and slowly drag the iron through your hair. The faster you pull the iron down the looser the curl, the slower the tighter the curl will be.
  4. After the iron is all the way pulled through your hair, you can use your fingers to twirl the hair into a curl. If you want you can pin the curl up with a bobbypin and wait for it to cool down.
  5. To finish it off, you can spray your hairspray to make sure the curls stay. (You can separate the curls with your fingers but do NOT brush them out)
The finished look:


A natural brown look


Hope you can see a bit better on the photo's:

Aqua & Turquoise look


Somehow I feel like the video doesnt do the look justice, hope the pictures will:


Mail me your pictures of my looks! I would love to put them on here :)

Thursday, 12 March 2009

Pink, Blue and Purple look


I had a pink and purple look in mind for a while, and Rachel asked me to add in some blue, so I did:

I also made a tutorial/review of my straightener but stupid me deleted a chunck of it, so now I have to start all over again >.<. In the above pictures it does show my curls, but for a vid you will have to wait till saturday.

Tuesday, 10 March 2009

Review coming up...

Today my new hair straightner and my new curling iron arrived. I bought these:

The Remington damage defence 180


The Remington Sleek & Curl
I quickly tried to curl my hair with the straightener, and I must say, so far im impressed. I have very thin crappy hair that is dyed to much, and normally when I put curls in they kinda dont last long at all. But I could even go through them with my comb and it still curled. This weekend I'll be going to a birthday party of a collague, so Ill be useing them. Ill do some review vids on them aswell...so if you have any questions...ask them before saturday ;)

(The Remington Sleek & Curl look, well, sorta, i still need practice)


Sunday, 8 March 2009

A few looks I have done...

...for my 365 Project (see my Flickr site for more photo's). I have no video's of these, but I might do so in the future (if you're interested ofcourse):

Hmm...yeah...I know...im a dork..euh...Zebra ^^.
This was for a ANTM theme
(not a 120 pro palette look btw)


A futuristic eye liner look


A simple green look


Me going Goth style


If you like a 120 pro palette tutorials of any of these looks, or any other looks for that matter, just comment here on my blog or send me an email!

Yellow, Red and Black Winged Goth look


I saw this cool look on a few different websites so I thought id give it a go with the palette:

Silver, Purple and Black Smokey look


This look was a request from Rachel, hope you like this look:


A more daylight shot:


If you have any requests for looks done with the 120 pro palette, let me know. Send me an email with a photo if you want a specific look! :)

Saturday, 7 March 2009

My stash of makeup

Up till now I really did not collect a lot of makeup, but I have to admit that it has been growing a lot the last few weeks. For my eyeshadow im only really using my 120 pro palette, but I am planning on getting more eye shadows soon. The only thing is, so far I have not located a MAC shop in holland (Grrrrrr) and since a lot of the MAC stuff on ebay is fake...im not sure what I want to get yet.

I have also been seriously thinking about doing a makeup artist evening course, tho I have to save up first since that will cost me alot...tho I guess it's worth it cause you get a huge makeup kit.

Anyway...ramble ramble...here is an outline of what I currently use (clicky clicky on the photo for a bigger, readable version):

It's probably very boring and it's not alot yet, but I figured, what the heck, let's be silly and take pictures and upload it >.<

Purple and Green look


Not a super complicated look, but I think it looks funky:

 
template by suckmylolly.com